

Step Three • LVM (part 1)
7. LVM partitioning
7a. Configure the Logical Volume Manager
This is where the previous page ended:
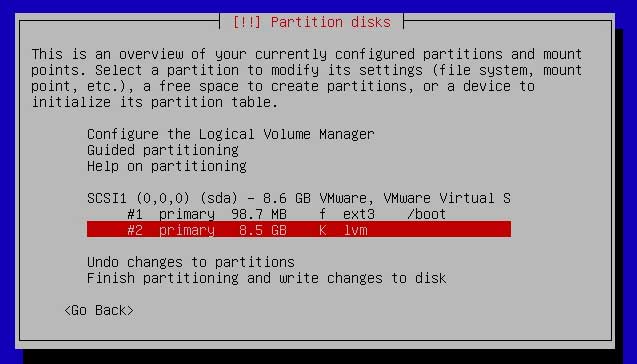
We are going to configure the Logical Volume Manager.
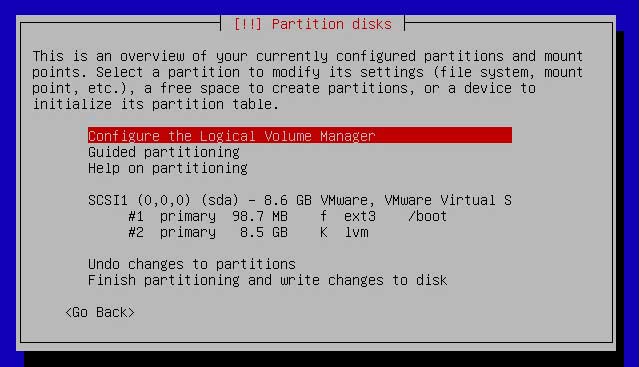
With Configure the Logical Volume Manager selected, hit Enter. You'll be asked if you want to write the changes to your disk:

Select <Yes> using the Tab key or the right or left arrow keys, then hit Enter. You'll see a summary:
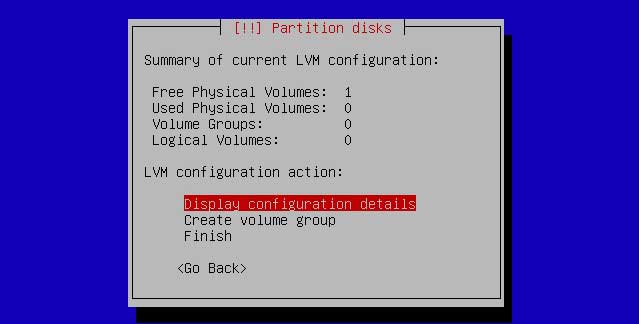
7b. Create volume group
The big primary partition we've made is going to hold logical volumes. Those logical volumes must be assigned to a volume group. Therefore, we must create the group first.
Using your keyboard's arrow keys, select Create volume group.

Hit Enter. You'll be asked to give the volume group a name.

If you're going to create more than one volume group, you might want to number them. If you're going to create just one volume group, like we do here, you may give it any name. You could let the name precede by vg for easier recognition by yourself later. You could name the volume group: vgSystem. Enter the name of your choice, then press Enter.
Now you've got to choose the device (disk) for your volume group:

There's not much to choose if you've only got one disk. You've got to select this disk by hitting the space bar.

After hitting the space bar you see that an asterisk * has appeared on the red spot between the brackets. This means you have selected this device. Hit Enter.
The summary shows that indeed you have created one volume group:
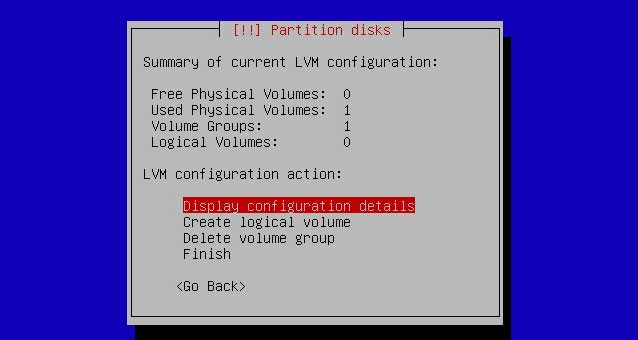
7c. Create logical volumes
Now it's time to create logical volumes. Your server needs the following 6 directories: swap, root, srv, usr, home and var. Let's assume you've got a 40 GB hard disk or bigger. You could than create volumes, adding lv to their names for later recognition, and choose the sizes in the middle column:
total 40000M 8500M lvswap 4000M 400M lvsrv 4000M 1000M lvusr 4000M 400M lvhome 4000M 400M lvroot 10000M 400M lvvar 14000M 5900M If your disk is smaller, make your own calculations. The last column is for a VMWare partition of 8500 MB. Should your disk be bigger than 40 GB, lvvar will get more.
So let's start. Select Create Logical Volume:

Hit Enter. You must now select the volume group your new volume is going to belong to. There's not so much choice, as you can see:

Hit Enter. Your system is going to need swap space to temporarily store data during processing. Swap frees process memory for your computer. Without swap space you'd notice hickups while your PC is working.

Type lvswap and hit Enter. You'll be asked to enter the size:
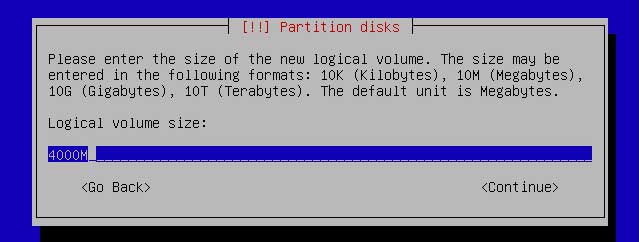
If your disk is big enough, type 4000M. If your disk is small, make your own calculation. Hit Enter.

As you can see in the summary, one logical volume was added to the list.
Now create more logical volumes using the following names and sizes:
lvsrv 4000M lvusr 4000M lvhome 4000M lvroot 10000M You start by selecting Create logical volume and hitting Enter each time. For every logical volume you go through the same cycle as we did for lvswap, i.e. selecting the (only) volume group, typing a name, choosing the right size (mostly 4000M) et cetera.
The last volume we create is lvvar. When it's time to choose it's size, don't touch it, so lvvar will get all the free space that was left. If you have a 40 GB disk, that'll be about 14 GB. If your disk is bigger, it'll be more. Just hit Enter. You'll get this summary:

With Display configuration details selected, hit Enter.

As you can see, all logical volume you created are there. With Continue selected, hit Enter.

With Finish selected, hit Enter. Sounds like we're ready, but we're not. You'll get this overview:

Now we've got to choose the file system and mount point for our volumes. We'll do this on the next page.

