

Choosing file system and mount points.
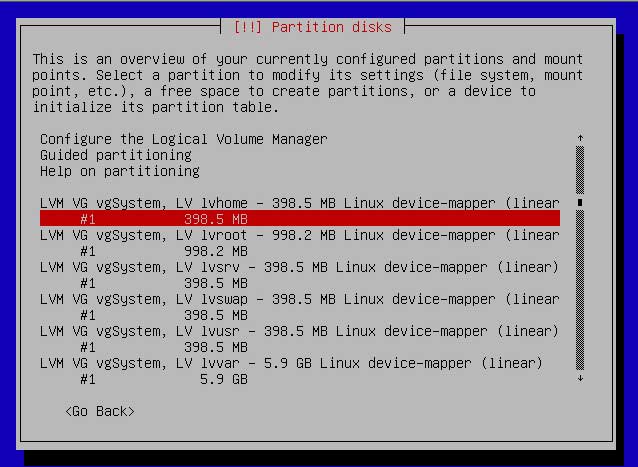
The 6 volumes in this overview are lacking a file system and a mount point. The partition settings must be completed now.

Using your keyboard's arrow keys, select the 2nd line of the first volume, that is, lvhome:
Hit Enter. Pay attention to the line Use as: do not use:

With Use as: do not use selected, hit Enter. There are several options:

Select Ext3 journaling file system and hit Enter. You'll get your choice confirmed:

Pay attention to the volume you're adjusting. It's lvhome, as you can read in the first line on your screen. Now you'll have to select the right mount point.
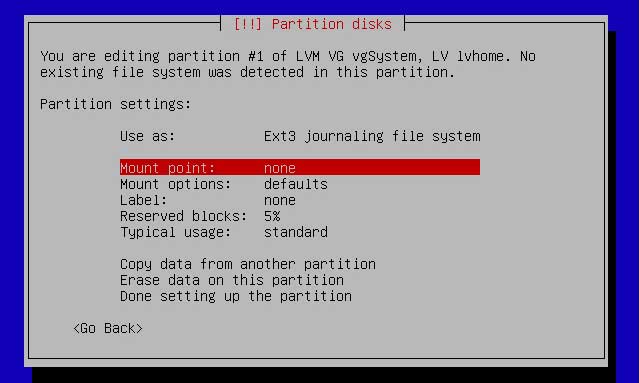
Select Mount point: none and hit Enter. Your new options are:

You were working on the home volume, remember? (If you're in doubt, hit the Tab key to select <Go Back>, then Enter, to verify.)
Using your keyboard's arrow keys, select /home and hit Enter. If you've done it right, you'll see:

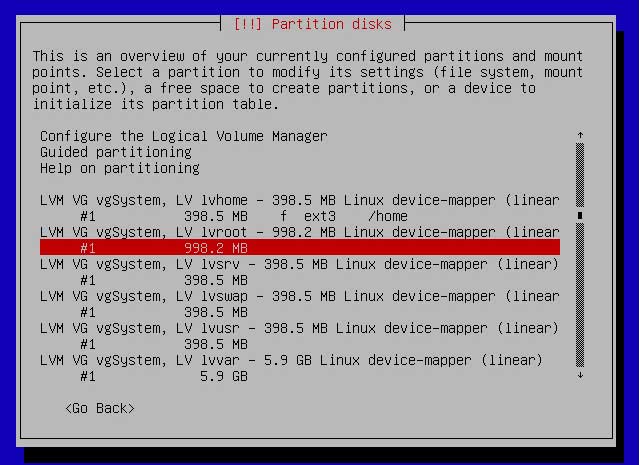
Compare the above picture with what you see on your own screen: the first line holds lvhome, file system is Ext3 and the mount point is /home. If that's what you've got, we're happy and ready with this partition.

With Done setting up the partition selected, hit Enter. As you see, lvhome has been assigned to mount point /home. This means that, once the system has been setup, you'll find a directory there called home.

Select the 2nd line of lvroot:
Hit Enter and you'll get the setup screen for lvroot:
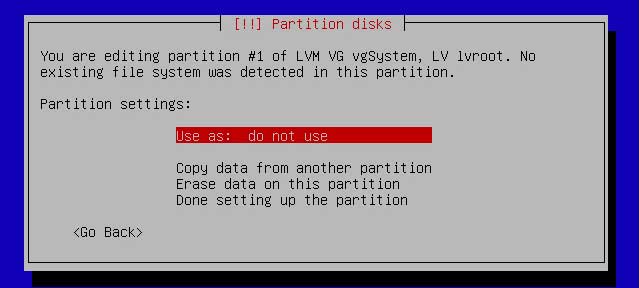
With Use as: do not use selected, hit Enter. You already know this one:
With Ext3 journaling file system selected, hit Enter. As you see, lvroot now uses the Ext3 journaling file system.

With Mount point: none selected, hit Enter. Next you'll see the mount point selection screen:

The root partition is marked by only a slash /. With this very root line selected, hit Enter.

As you see, lvroot now uses the Ext3 file system and mount point /.
With Done setting up the partition selected, hit Enter.

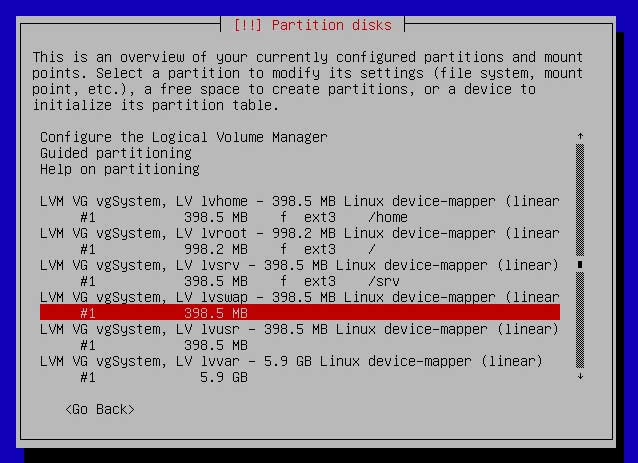
Above you see the overview again. Now, set up lvsrv the same way as lvhome and lvroot before, choosing file system Ext3 and mount point /srv.
When you're done with lvsrv, we'll do something different for lvswap.
With the 2nd line of lvswap selected, hit Enter. You'll see a familiar screen:

With Use as: do not use selected, hit Enter. This time we need a different option:

With swap area selected, hit Enter.

Since lvswap is now indeed used as swap area, select Done ... and hit Enter.
There are 2 volumes left, lvusr and lvvar. Both use file system Ext3, their mount points are /usr and /var.
Your PC remembers the last file option you chose, which was swap area. Be sure to select Ext3 for lvusr and lvvar.
When you're done, you'll see the file system types and mount points in the overview.

Use your keyboard's arrow keys to scroll down.

Select Finish partitioning and write schanges to disk and hit Enter.

Use the Tab or left arrow key to select <Yes> and hit Enter.

Your PC will start formatting the partitions and install the base system. On to the next page.

