

Step Six • Get ready for remote control
10. Login as user and superuser
- Reboot
- Login
- Superuser
11. Instal SSH and vi
- Install SSH
- Install vim-nox
12. Make the server's own IP address static using vi
10a. Reboot
This was the last screen of the previous page:
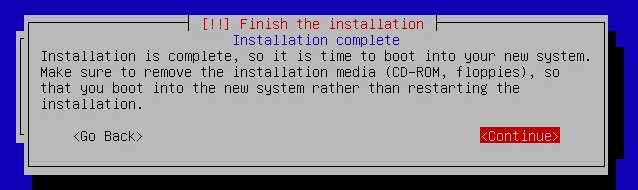
Remove the CD from the tray and hit <Continue>. You'll see a white on black message stating the system is going down.:

The newly installed system will then boot. First you'll see this screen:

10b. Login
You don't have to do anything. Debian will be booted automatically. When the system is running, you'll see:

Type your username, for example newuser, or whatever username you chose during the installation:

You'll be prompted for the user password you chose during installation.
Type your user password. You won't see it appear when you type. When you're ready typing, hit Enter.
This is how the system welcomes you:

As you see on the last line, the user newuser is logged in on host server01. If you chose another user and host during installation, you will see the names of your choice instead.
For newuser the command line will always start with newuser@server01:~$. Compare this to what your own screen shows.
10c. Superuser
Next we are going to do some things for which you need the permissions of the root user, also called superuser. On the command line, type su.
You'll be prompted for the root user password, which you chose yourself during installation.
Type your root password. You won't see it appear when you type. When you're ready typing, hit Enter.
Watch the command line, where newuser@server01:~$ has been replaced by server01:/home/newuser#. This means that from now on you'll be issuing superuser commands.
Take another look at the last line: server01:/home/newuser#. It means that the superuser (root) is now logged in on host server01 and that the current location is directory newuser inside the directory home. If during installation you chose your own host name and username, you will see those instead.
TIP For the install commands below it doesn't matter what the command line starts with, as long as it ends with a hash #.


11a. Install SSH
We want to be able to approach the webserver from another computer. Therefore, we need to install ssh.
Following the hash #, type: apt-get install ssh openssh-server. Then hit Enter.
You'll be asked whether to continue or not. Yes, so type y and hit Enter.
You'll see processes taking place on your screen. Take a back seat. After ssh has been installed, the last line will again be something like:
11b. Install vim-nox
You will need to be able to edit system files. You'll need an editor that works from the command line. We'll install the vi editor vim-nox. Type apt-get install vim-nox and hit Enter.
Continue or not? Type y ...
With the installation completed, you will start using the vi editor to change files from the command line. Instructions for editing you'll find below.
12a. IP address
Using the vi editor you’re going to give the webserver a static IP address. First, you need to know the internal IP address of your router. If you don't know its IP address, type route -n on the command line and hit Enter.
In this case the router or gateway ip address is: 192.168.178.1 for a Fritz!Box:

IP addresses for routers look like this: 192.168.x.x. The first 6 figures are the same for all routers. Here we'll use the IP address for a Fritz!Box, being 192.168.178.x. In the file below, replace it by the IP address of your own router (consult your router's manual, if necessary).
Once you know your router's IP address, type vi /etc/network/interfaces on the command line ...
... and hit Enter.
The editor vi has now opened a file called interfaces, which is located in the directory network, which on its turn is located in the directory etc. You cannot use the mouse while editing, you must use the keyboard.

Watch the last line. You see: "/etc/network/interfaces".
12b. Editing in vi
Now, hit the I (the character i) on your keyboard.
Take a look at that last line again: -- INSERT --. You may now edit and insert or delete text.
This is what you need to know for editing in vi:
<= keyboard hits => action i insert (start editing) arrows move around backspace delete to the left delete delete to the right esc stop editing esc :w enter stop editing, save changes and keep vi open esc :wq enter stop editing, save changes and exit vi esc :q enter stop editing, exit vi without saving Click the vi & shell help panel for instructions. You open the panel at the top right of many pages.
12c. Make the IP address static
Using the arrow keys move the cursor down to the line containing allow-hotplug eth0.

Make sure you're in the insert mode. If you did indeed hit the i on your keyboard, you're now ready to edit the code.
We'll turn the line into a comment by typing a hash # there.
Comments start with a hash # and are not executed by the system. Programmers use the term comment out placing a hash # whenever they want to exclude a command from being executed.
The reason for commenting out this particular line is that we want to be able to restart the network without having to restart the entire system. Therefore, we'll replace this line by auto eth0 in a minute.
First, comment out the line iface eth0 inet dhcp the same way.
The reason for commenting out this line is that we don't want DHCP to assign a dynamic IP address to your Linux system. For our webserver we need a static IP address, static meaning: always the same.
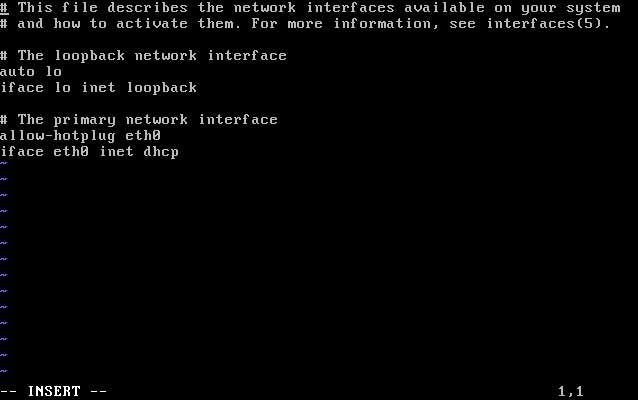
Move the cursor to the end of the line #iface eth0 inet dhcp and hit Enter to create a new line. Add these lines:
auto eth0 (the last character is a zero)
iface eth0 inet staticNow we've got this:

Now you need that internal IP address of your router, as we mentioned above in 12a. In this example we'll use 192.168.178.1 for Fritz!Box. You'll have to modify the scheme below according to your own router's specifics.
The address on the first line you will add now is going to be the internal IP address of your webserver. You will base it on your router's address, choosing a new figure for the last one (1). Avoid choosing the exact address of your router (1) or another computer already on your local area network (LAN). So if your router has address 192.168.0.1, replace the last figure by a free spot, for example 99, making it: 192.168.0.99. You can pick any free spot instead of 99.
The Fritz!Box router has address 192.168.178.1, so again, we could pick 192.168.178.99 for the webserver, which is what we'll do. Hit Enter to go to the next line, hit Tab and type your router
address 192.168.178.99 to make it look like:
Remember that everytime you see those first 9 figures 192.168.178 you’re looking at the Fritz!Box’s address, which you must replace by the address of your own gateway. Gateway is another word for router.
Now add the following lines, replacing the bold figures (178) by your own router's specific data:
netmask 255.255.255.0
network 192.168.178.0
broadcast 192.168.178.255
gateway 192.168.178.1This will make the file look like:

In order to save the file, do this:
• hit the Esc key (when you do this the term -- INSERT -- will disappear from the bottom line)
• type :wq (the colon : is part of the command; you'll see :wq appearing in the bottom line)
• hit EnterThe screen will issue a confirmation: written.
The vi editor is closed now and you're back on the command line.
12d. Restart the network
Because of the IP address modifications you must restart the network.
Type /etc/init.d/networking restart
... and then hit Enter.
You'll get a confirmation when it's done:
Since ssh has been installed and we’ve established a static IP address, we may start using the webserver from another computer now.
We'll do that on the next page.
