

Step Seven • Remote login & updates
13. Remote login, changing directories
- Terminal: log in as user
- Switch to superuser mode
- Changing directories
14. Continued configuration
- Edit hosts
15. Updates and upgrades for Debian
13a. Log in as user
You can now log in to your webserver from another computer using ssh. On a Linux system or Mac you use Terminal, an application which is already there.
On a Windows PC you can use a little program called - + PuTTY. -
Download PuTTY. It's icon will be on your desktop:

Doubleclick on it. You'll get this screen:

Enter your new server's IP address in the Host Name field. This will be your equivalent for 192.168.178.99.

Click Open. You'll get a security alert:

If you trust yourself, click Yes. You'll see a screen resembling Terminal:

Enter your user name:

You'll be asked for your password. Enter it (it won't be shown):

Now you're logged in as user:

Let's log in as superuser. Type su and ...

... hit Enter. You'll be asked for the superuser password.

The password won't be shown while you're typing it. Hit Enter. Now you're logged in as superuser:

You can now proceed to 13c. Changing directories.
Start Terminal on your other computer. You'll see something which is called the bash/shell command line and looks like this:
Type ssh, followed by your webserver's IP address, for example 192.168.178.99, followed by -l and your username, like newuser. In short, type your equivalent of:
ssh 192.168.178.99 -l newuser.
Make sure to replace all data by your own.
Hit Enter and you'll be asked whether you are sure:

Yes, you are sure. Type: yes and...
... hit Enter.
Now you're invited to type the user password:
Type your password for newuser (you won't see it appear while you type) and hit Enter.
You're logged in as a regular user:

13b. Switch to superuser mode
You don't want to be just a regular user with limited permissions. We've still got a lot of installing to do and for that you must be a superuser. Type su and...
... hit Enter. And guess what? Now they want you to give your superuser password. Type it and...
... hit Enter. As a superuser you'll now see the new, third line here:
Once you've got superuser permissions, you can screw up your whole system, so don't do anything if you don't know precisely what you're doing.
13c. Changing directories
The above section /home/newuser indicates that your current directory is newuser, which is located inside the directory home. Just for fun, let's switch to the root (/) directory. In Terminal you change directories by typing cd followed by a path like /etc or /home or / (for root).
In order to change to the root directory, type cd [space] / like:
... and hit Enter. Now you're in the root directory:
As you can see, the path is only / so that means the current directory is root.
TIP 1 In order to reach files in a different directory you can always stay where you are as long as you include the path to a file in the command. For example, below we'll edit a file inside the etc directory ‘without being there’, so in the command we'll include the path /etc/.
TIP 2 For help with coding, click the vi & shell panel at the top right of this page.


14a. Edit hosts
We've got to tell the hosts file about the configuration of our system. The hosts file is located in the etc directory. We'll tell our vi editor to follow the path for getting there and opening hosts. Type:
vi /etc/hosts
... and hit Enter. In vi this is what hosts looks like:
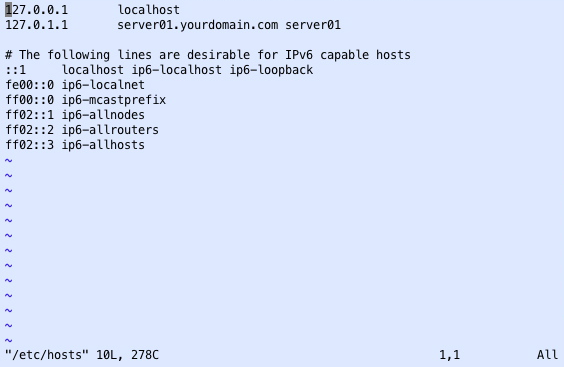
Hit the i on your keyboard and watch -- INSERT -- appear on the bottom line:

You can start editing now. The top lines currently are:
127.0.0.1 localhost 127.0.0.1 server01.yourdomain.com server01 Change these lines to make them look something like the lines below, making sure to replace the sample IP 192.168.178.99 by your Linux server's own correct IP address:
127.0.0.1 localhost.localdomain localhost 192.168.178.99 server01.yourdomain.com server01 When you're done ...

... save the file by hitting Esc and typing :wq and then hitting Enter.
Now add your domain to the hostname file. In Terminal type your equivalent of:
echo server01.yourdomain.com > /etc/hostname
... and hit Enter.
In order to make this change take effect immediately, type:
/etc/init.d/hostname.sh start
Let's check what we've done here. We'll run two commands. Both times you must get the same result, being your equivalent of server01.yourdomain.com.
In Terminal, type: hostname
... and hit Enter. You should see your own equivalent for server01.yourdomain.com:
If you don't get your own server's hostname and domain name, repeat the previous steps until you get it right.
Time for the second check. In Terminal, type: hostname -f
... and hit Enter. You should see your own equivalent for server01.yourdomain.com:
Again, if you don't see your own server's hostname and domain name, repeat the previous steps until you get it right.
15a. Antivirus updates
The Debian package includes the open source ClamAV virus scanner. For correct regular updates you should edit the file sources.list. In Terminal, run vi /etc/apt/sources.list
TIP Run means: type a command and hit Enter.
In the file that opens take a look at the line:
deb-src http://volatile.debian.org/debian-volatile lenny/volatile main

Start editing the file (hit i on your keyboard) and add the following code at the end of that line:
contrib non-free
... to make it look like:
Save and quit by hitting: Esc + :wq + Enter.
ClamAV is ready to be updated now.
15b. Update Debian
Update your freshly installed Debian system. Run: apt-get update
When the update is ready, you'll see something like:
15c. Upgrade Debian
Upgrade Debian. Run: apt-get upgrade
When the upgrade is ready, the system will give you the number of changes (in this example none):
Go to the next page to continue building your webserver.